Spectrophotometric Color Calibration in Pixinsight
You can either watch the video above OR read the very detailed step-by-step walkthrough below.
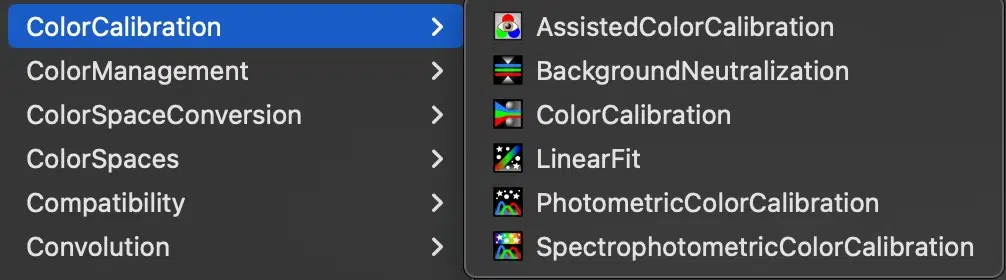
The Pixinsight Color Calibration process is difficult to understand; you have so many different ways to do color calibration. This is the color calibration process menu in Pixinsight:
The menu (like everything else in Pixinsight) is overwhelming for beginners and you should focus only on two types of color calibration:
Color Calibration
Spectrophotometric Color Calibration (SPCC)
I will go over SPCC, as that process is more desirable and effective but more difficult to implement.
In short, I use basic Color Calibration when SPCC doesn’t work. However, my first choice is always to use SPCC.
What Is Spectrophotometric Color Calibration (SPCC)?
Spectrophotometric Color Calibration is an advanced color calibration process in Pixinsight that calibrates your image’s colors based on the colors documented in star databases. That’s cool because most of us would like our stars and galaxies to look as close as possible to what we understand they look like.
When I started, SPCC was too difficult. I tried to do it, but it never worked. So, I searched the Internet for articles like the one I’m writing now, but the information was sparse. I wanted to write this for anyone in my shoes, banging their head on the desk and wondering how to get this to work.
Most people miss the fact that Pixinsight does not include everything you need to complete this process. You need to go to their website to download the star databases, which are integral to this. The next step in this tutorial is to download the Gaia databases, which is where we will start.
Download the GAIA databases
You need to download the GAIA databases from Pixinsight’s website. This is a chore in itself. The databases in their smallest form are ~12 GB. You can also download a more extensive GAIA database ~35 GB, but you don’t need that as an amateur astrophotographer.
Step 1: Go to Pixinsight.com
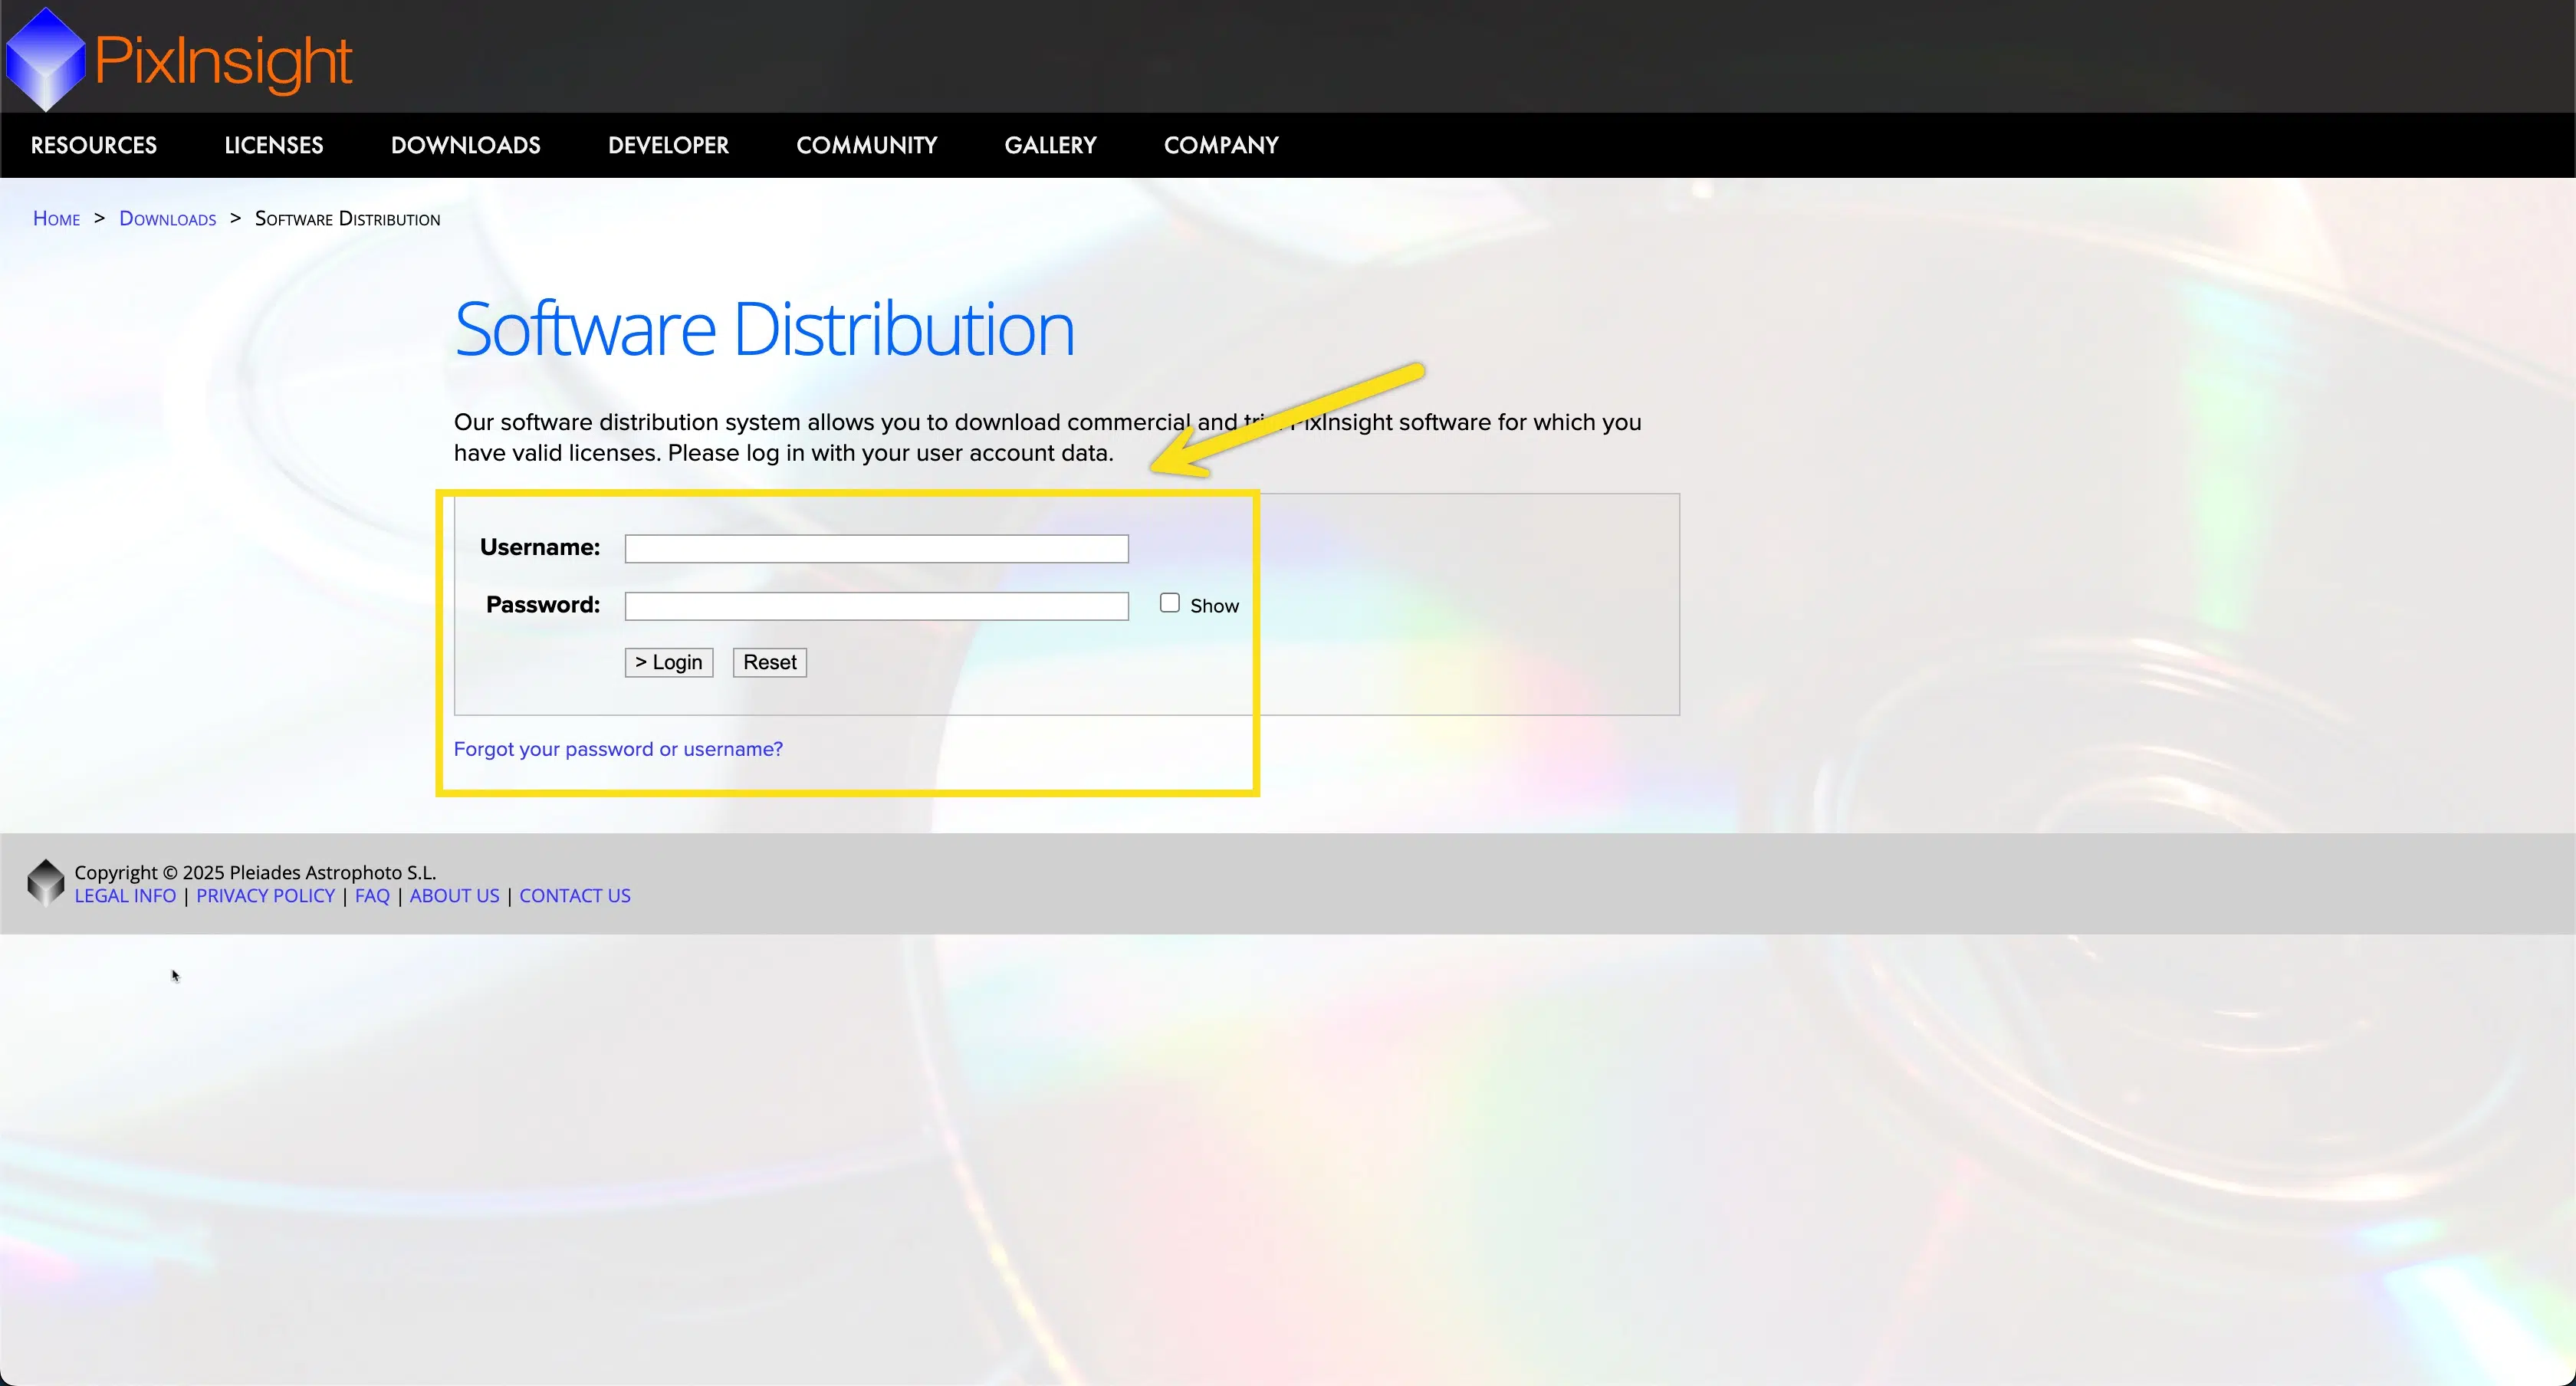
Go to Pixinsight’s website and on the menu downloads and then software distribution.
Step 2: Login
Next, you will be asked to log in to Pixinsight. If you purchased Pixinsight, you have a login. Use the “forgot your password” feature if you don’t remember.
Step 3: Download Multiple Database Files
There are multiple database files, and Pixinsight, being Pixinsight, doesn’t just wrap them in a nice zip file for you, you need to download each one.
Step 3A:
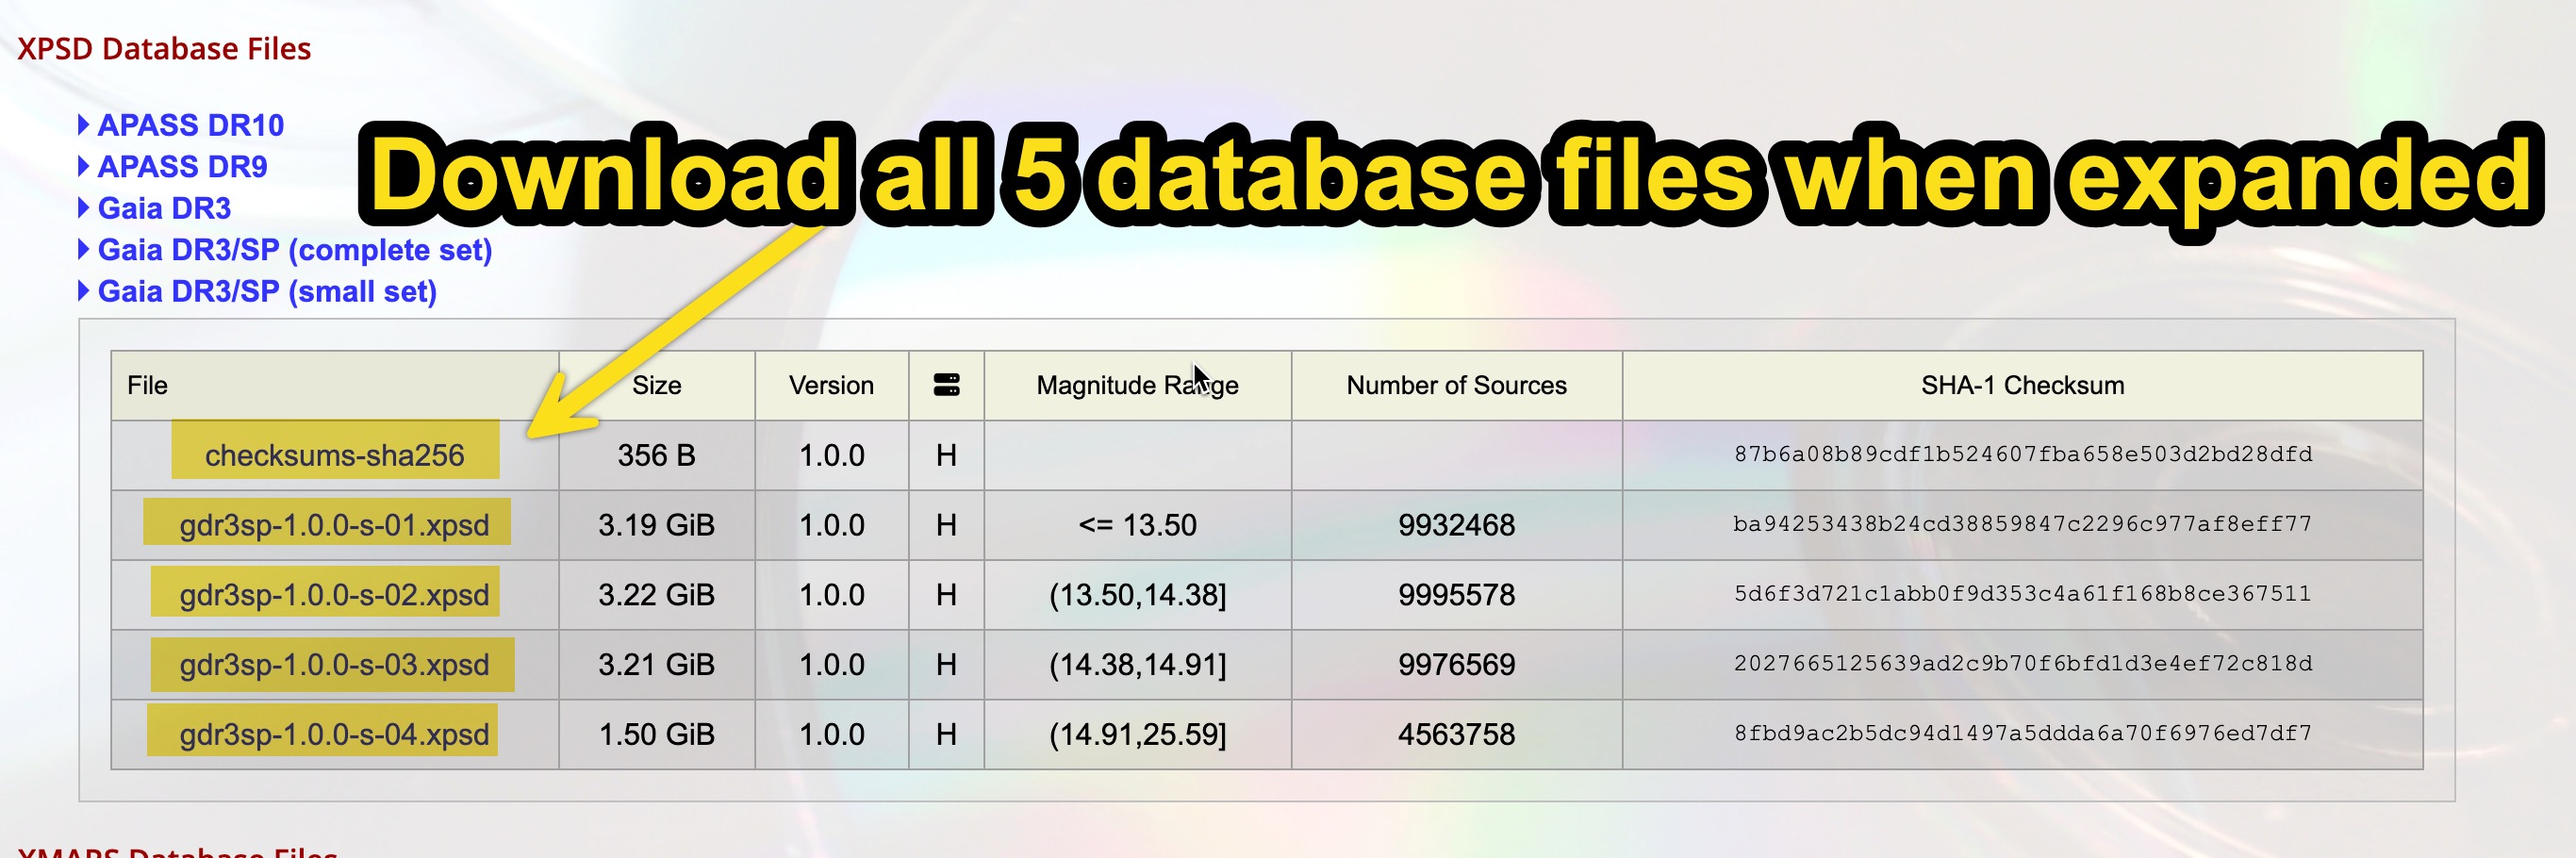
Click the Gaia DR3/SR (small set) to expand all the database files for download.
Step 3B:
Once expanded, you will see all the database files, you need to download all 5.
Storing Database Files
Okay, you are done with the downloads. You need to put them somewhere safe where they won’t get deleted accidentally. Your downloads folder is not that place. I initially stored them in an iCloud folder, but iCloud decided they had not been opened and put them in the cloud to save me storage space. This caused it not to work. Instead, I put them in my pictures folder, which is not synced with iCloud on my Mac.
Installing the Gaia Database Files on Pixinsight
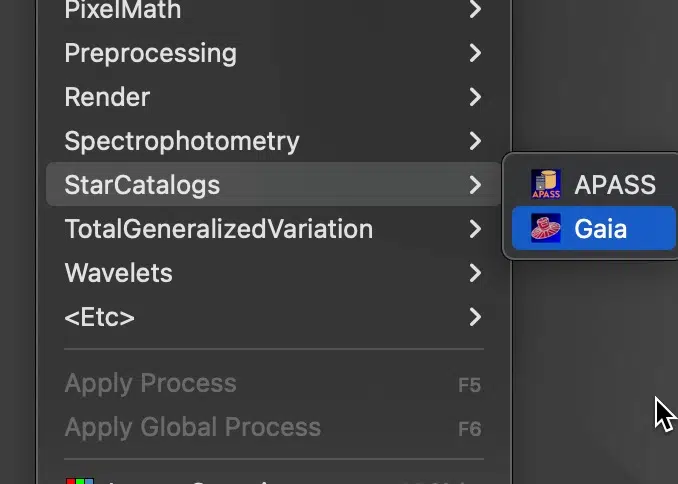
Step 1: Go to the Star Catalogs Process
From the process menu, go to star catalogs and then choose Gaia.
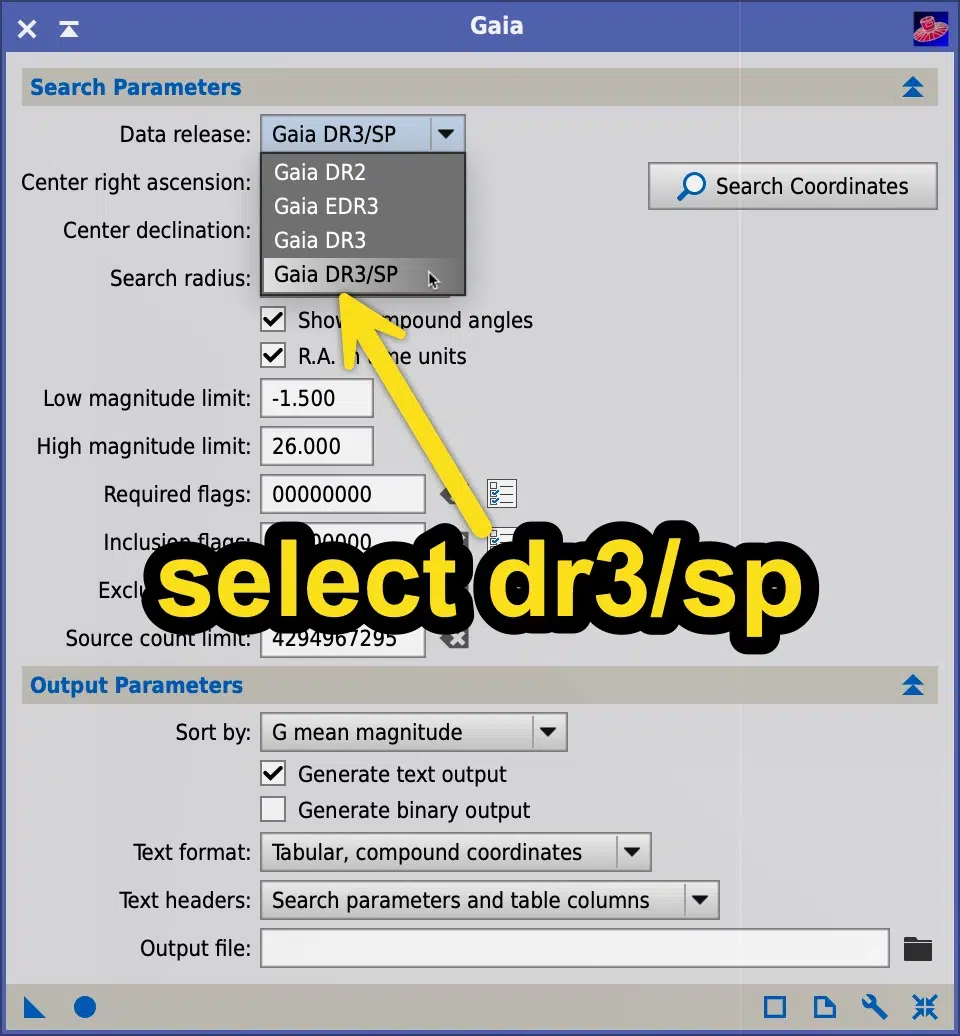
Step 2: Choose the Gaia DR3/SP Database
Choose the Gaia DR3/SP database from the data release field.
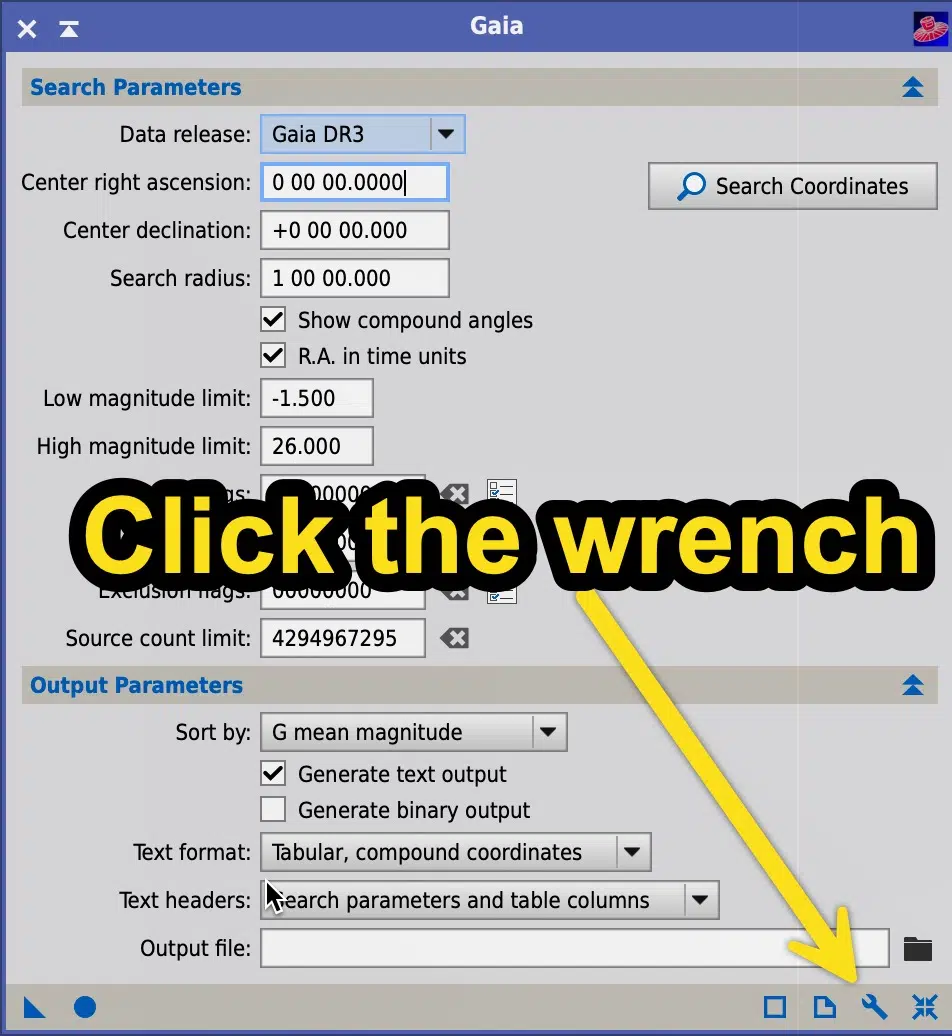
Step 3: Click the Wrench
Click the wrench on the bottom right to load in the database files you downloaded.
Step 4: Load the Database Files
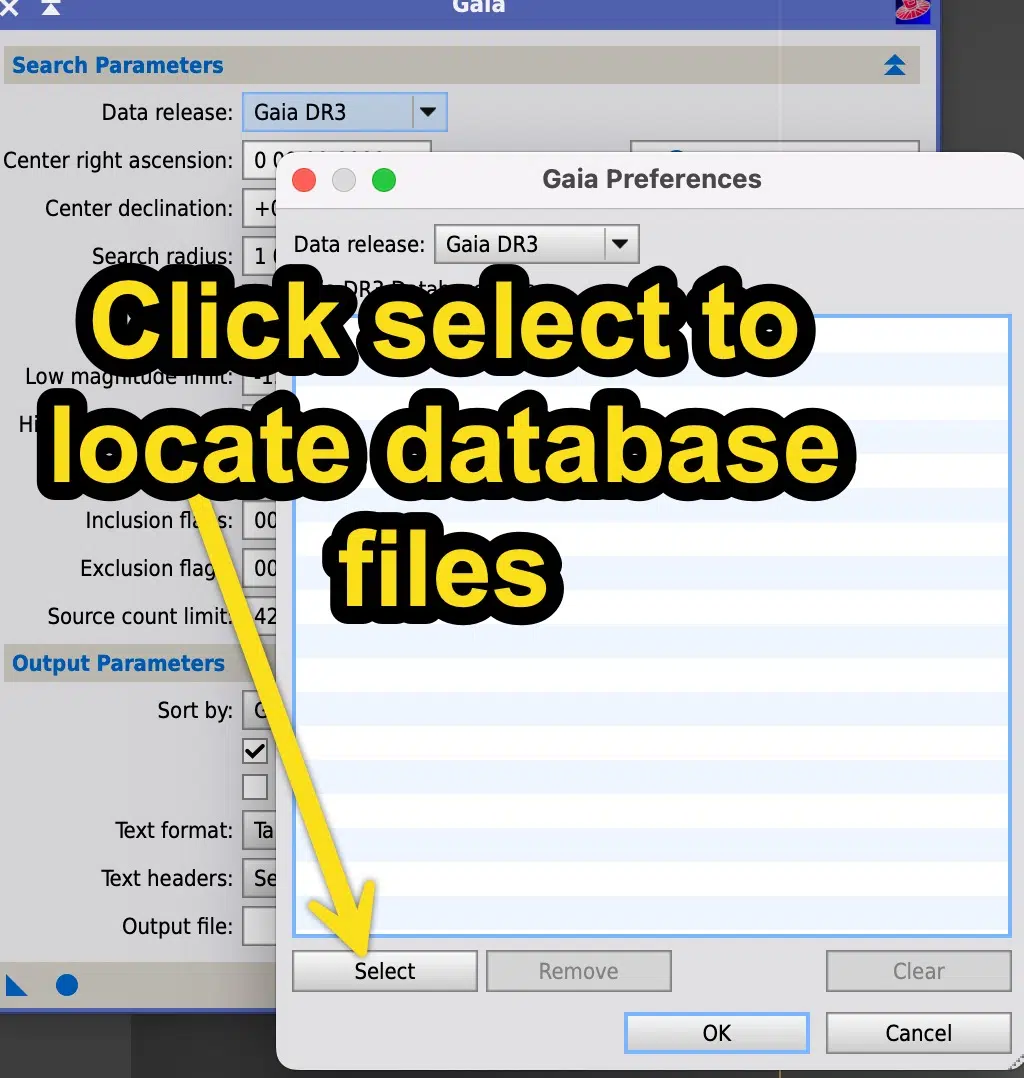
Step 4A:
Click select from the interface to load in your database files.
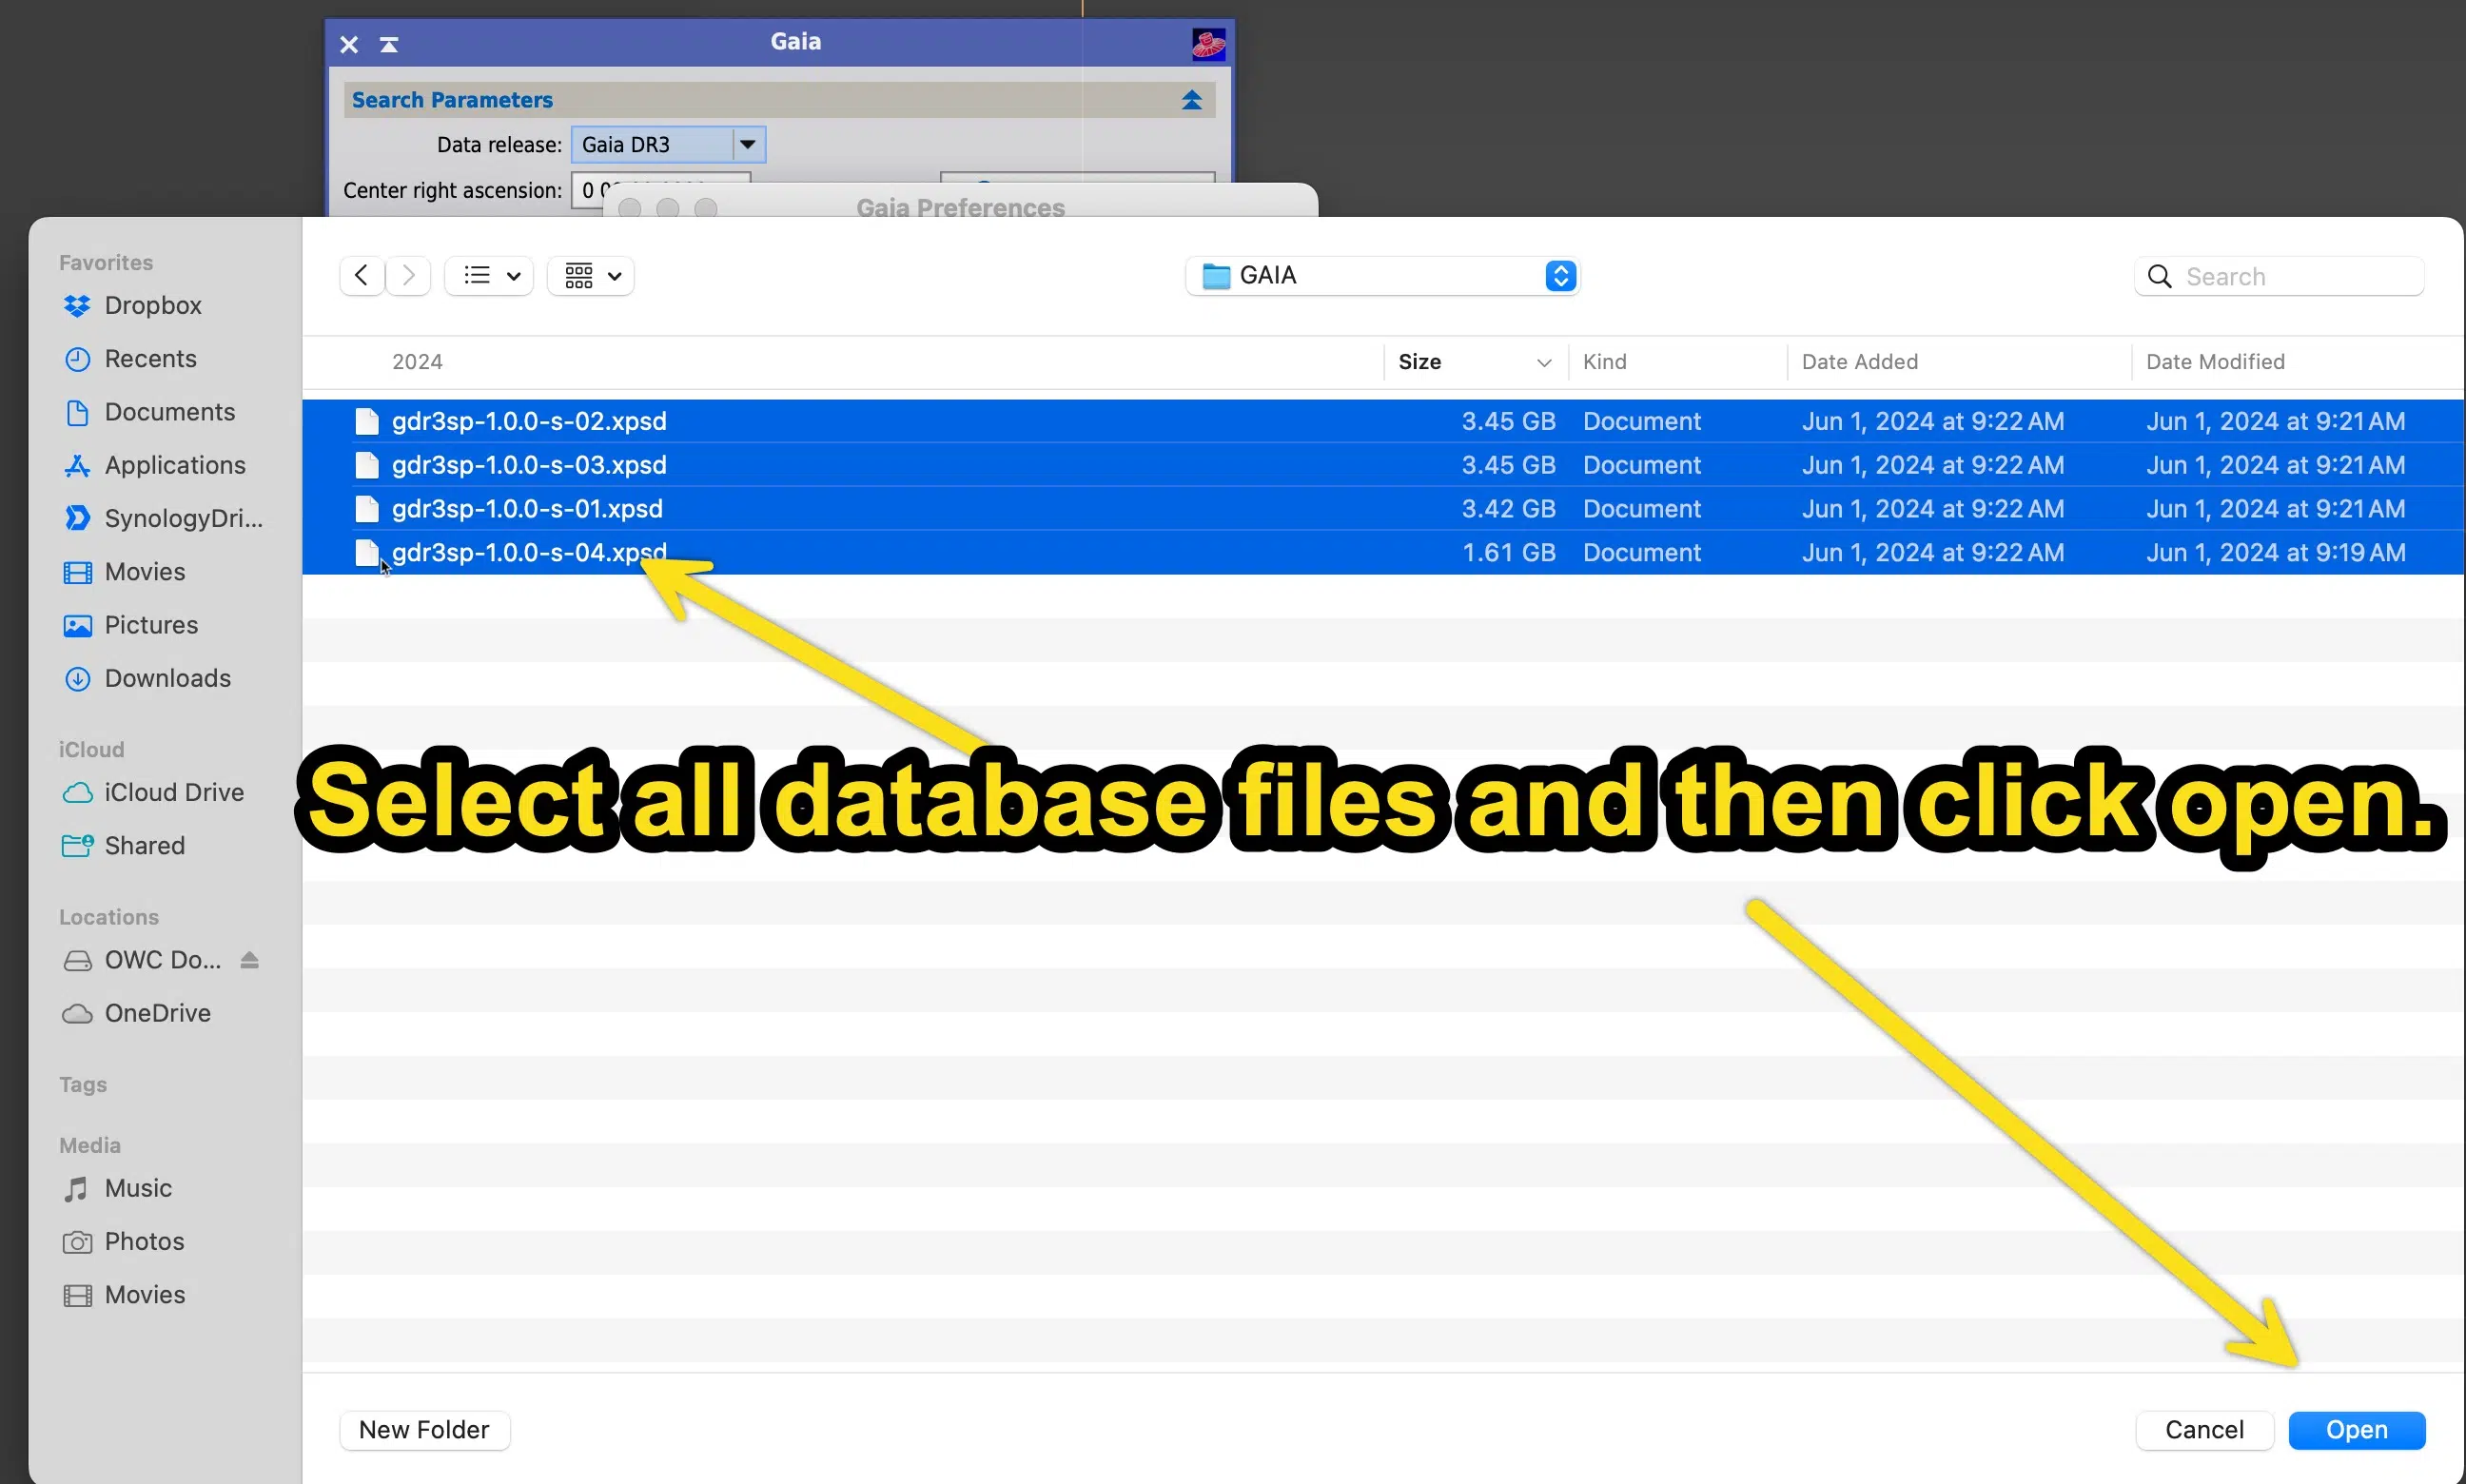
Step 4B:
Select the files from the Finder / File Explorer to load in. You can select all the database files by clicking CTRL-A or CMD-A. After you have selected them all, click “open”.
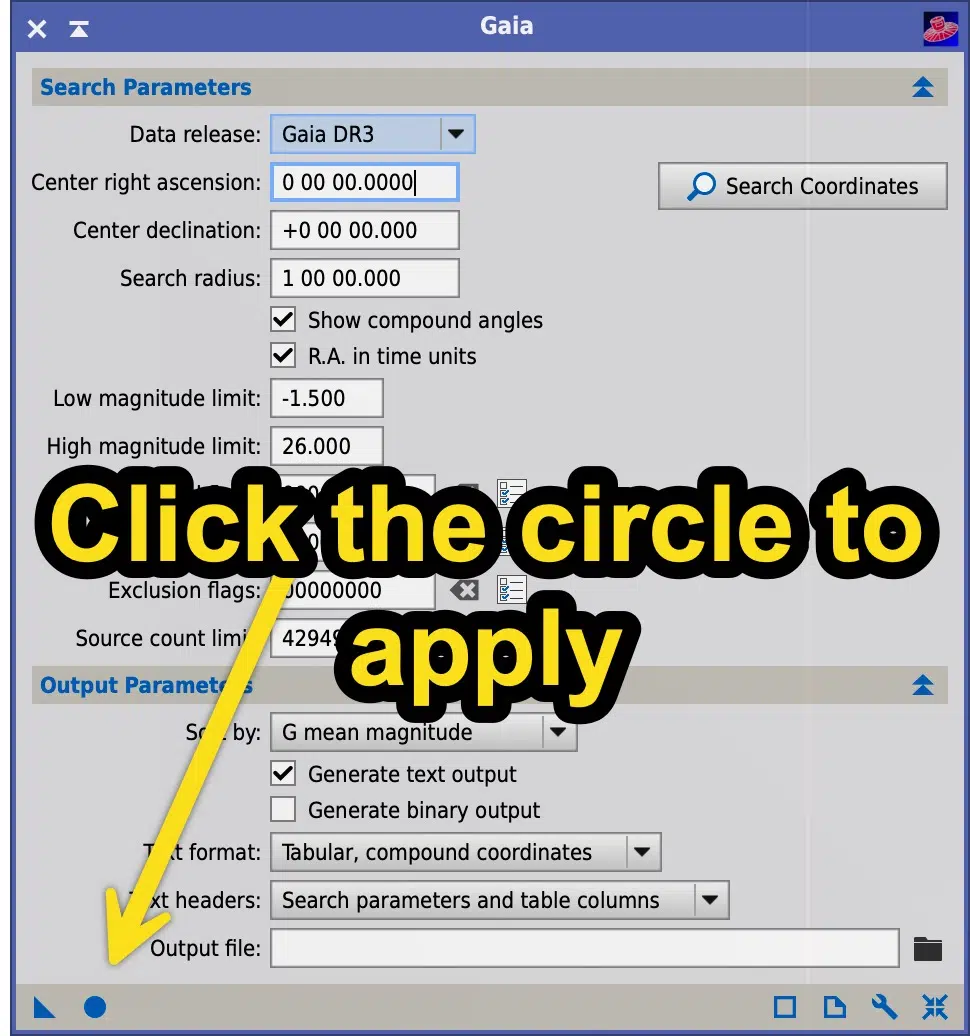
Step 5: Click the Circle
Click the Pixinsight circle in the Gaia interface to save your Gaia star catalog configuration. That should be it!
Spectrophotometric Color Calibration
Wow, that was exhausting! Now comes the fun part where we get to use the Gaia database. The Gaia database powers 2 tools in Pixinsight that are needed for Spectrophotometric Color Calibration:
Image Solver
SPCC
We need to solve our image first so SPCC knows where it is and can reference it in the star database. If you try to use it without solving the image, it will give you an error.
Image Solver
So, our first process is to solve the image. Solving an image takes a few steps which I will outline below.
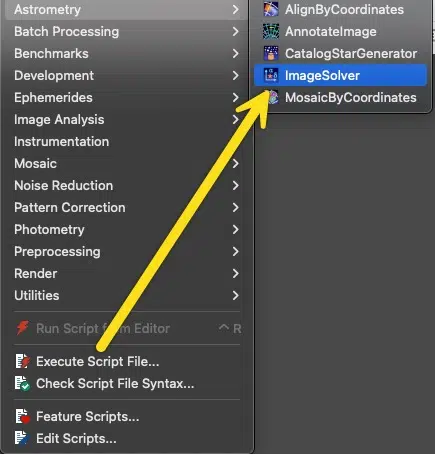
Step 1: Open Image Solver
Go to Pixinsight’s Image Solver script in script > astrometry > ImageSolver. Note: In the previous version of Pixinsight (1.8x Ripley), image solver was located in scripts > image analysis > image solver
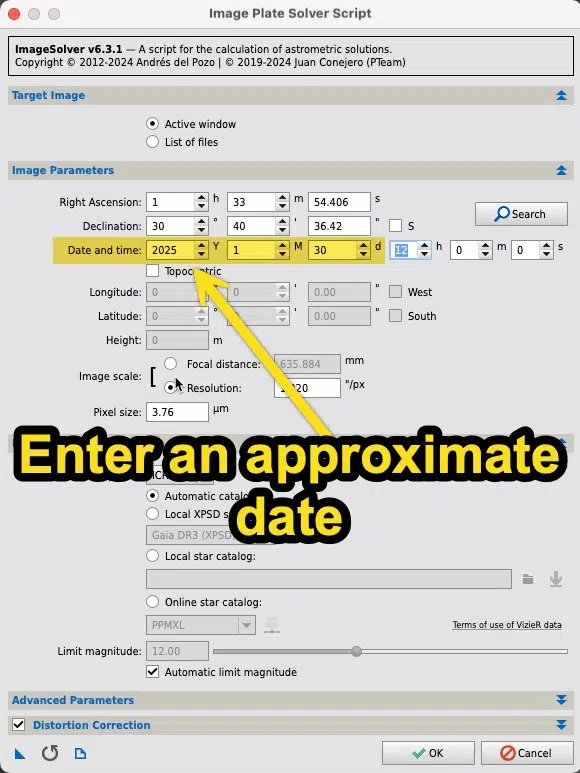
Step 2: Enter an Approximate Date
Once the Image Solver window is open, you need to enter an approximate date. Most images are not created in one night. So, enter an approximate date.
Step 3: Search for Your Astronomy Target
Click the search button to search for the target that your image is of. For me, this was Messier 35. There are a few clicks, which are outlined below.
Click the search button
Enter your object name once the search interface is up (a different window). For me, this was M35 and click the search button on the right.
You will get search results. Choose any of the objects that are your target. There will be multiple of the same target.
Click OK
Step 4: Enter Your Telescope Focal Length and Camera Pixel Size
You must enter your telescope focal length, including any reducer you used. So, if you have an 805mm telescope and use a .8X reducer, your focal length is (805mm * .8 = 644mm).
Next, you need your camera’s pixel size. You can usually find this in the specs for your camera on High Point Scientific or Agena Astro. I have a ZWO ASI533MM which has a pixel size of 3.76μm. So, I entered 3.76.
Once done, you can click the OK button to run the script. It should solve the image if everything is installed (including the Gaia database) correctly.
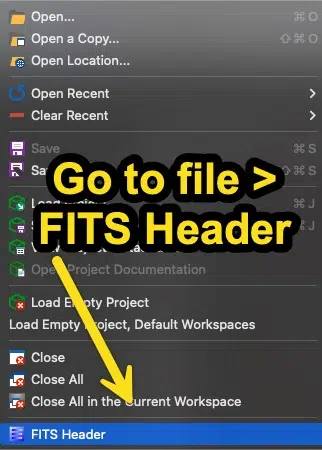
Step 5: Checking to Make Sure It Was Solved
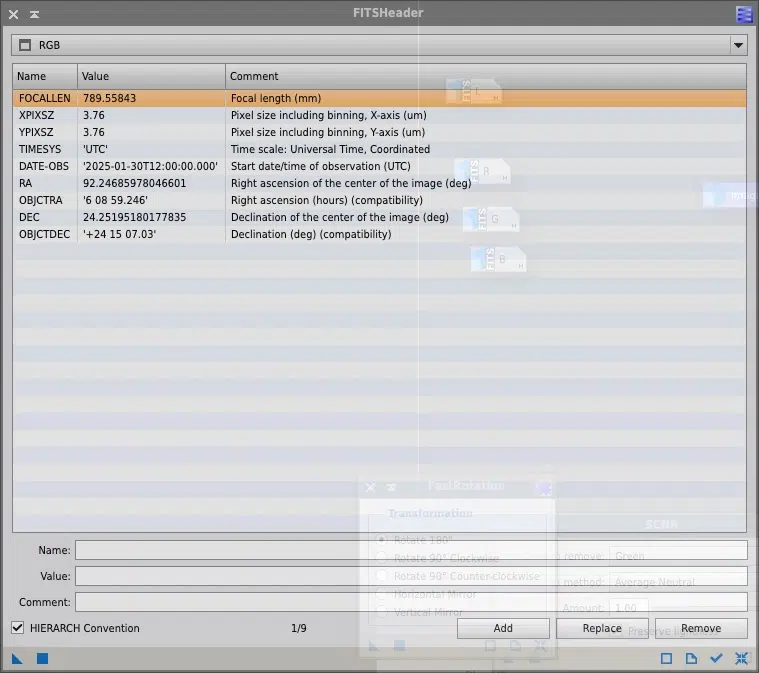
You can go to the file > FITS header menu to check that your image was solved.
If it was solved successfully, you will see information in the FITS header as you see in the screenshot below. If there is nothing here, your image did not solve and you’ll need to troubleshoot why.
SPCC Process
Finally, the last step here is the process of SPCC itself.
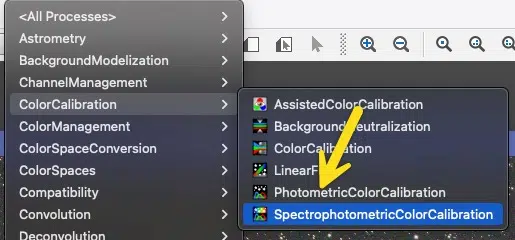
Step 1: Navigate to SPCC
Go to process > color calibration > spectrophotometric color calibration
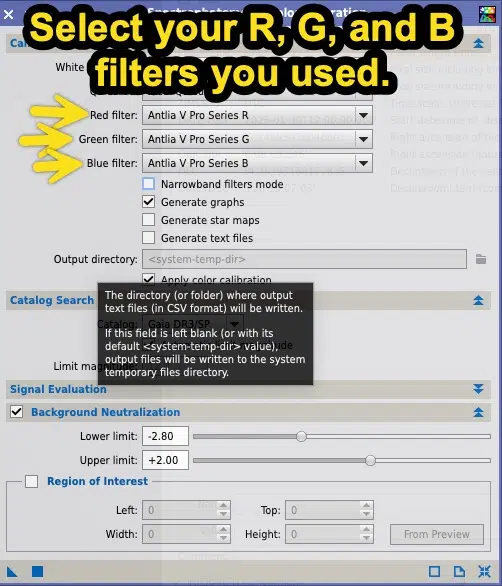
Step 2: Select Your RGB Filters
The first and only thing you must do now is select which color filters you used. The menu has quite a few filters. If you shoot with an OSC (One Shot Color Astro Camera), you likely only used a UV/IR cut filter and your sensor. In that case, choose Sony Sensor > UV IR Cut. Most Astro Cameras use a Sony sensor. If you used your mirrorless camera, there are many options for Canon and Nikon. I shoot mono and use Antlia V-Pro Color Filters.
Step 3: Background Neutralization / Region of Interest
Under background neutralization, click the region of interest box. After you do that, you will need to make a preview box on a piece of the image that is background. Once your preview is done, click the “From Preview” button. You will then need to choose the preview.
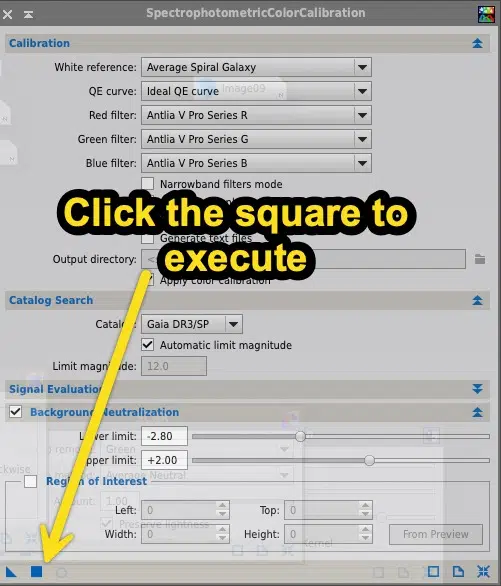
Step 4: Click the Square
Once you have selected your filters and completed the background neutralization, you are done. You can leave the rest of the default settings alone. Click the square in the bottom left to execute.
Step 5: Confirm Spectrophotometric Color Calibration
Once SPCC is done, you will get a “certificate” of sorts. See screenshot below of my certificate. You can close this as it’s useless, but it does confirm it was done.
Step 6: Adjust Screen Transfer Function
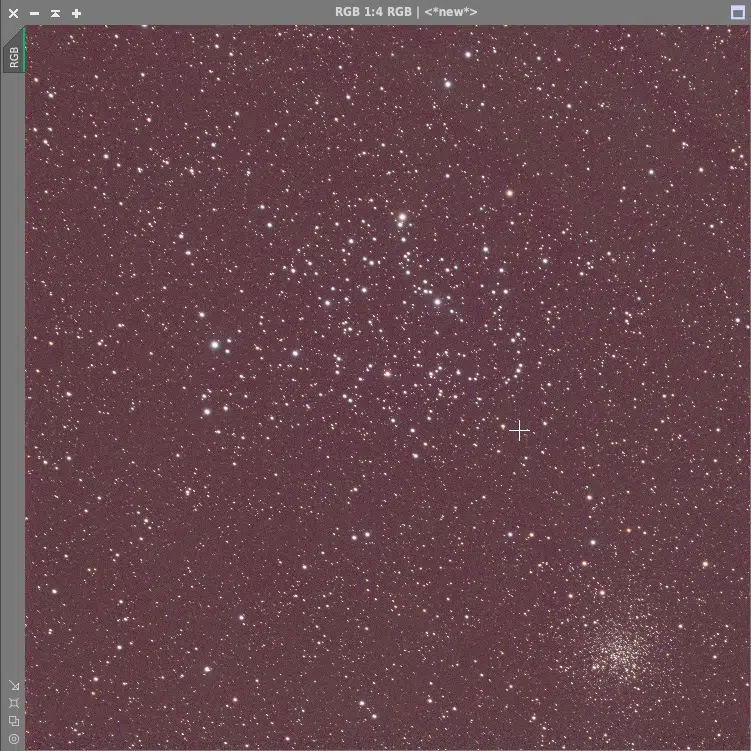
When complete, the image may look strange with a color cast. See my image of M35 below with a color cast.
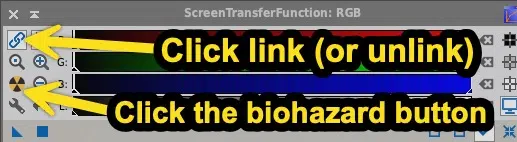
To fix this, you must go into the Screen Transfer Function in process > intensity transformations > screen transfer function.
Once the screen transfer function is ready, click the link and then the biohazard button and your color cast should be gone!
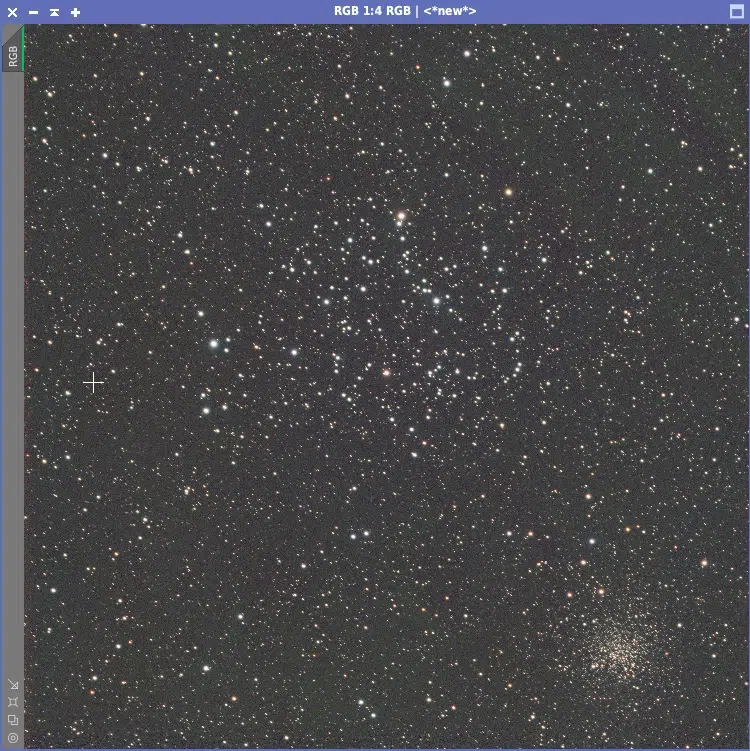
You should now see your image without the color cast:
Comparing Before and After Results
You likely won’t see that many immediate changes once Spectrophotometric Color Calibration is complete, but you will notice the difference if you don’t do it as you process the image further. It’s extremely dull and neutral when it comes out of Spectrophotometric Color Calibration. For example, in the image below, you will notice that the star patch in the lower right corner is more gold in the before picture and more neutral in the after picture.
Instructions:
Here are both images before and after. If you are on a desktop computer, roll over the image to see what it looks like after. Roll off the image to see what it looks like before. On a mobile device, touch the image area to see what it looks like after and touch a non-image area to see what it looks like before.