
I want to dive into something I spend a lot of time thinking about (and doing) when I’m processing my narrowband astrophotography images: which color mapping method should I use? For me, it usually comes down to two main contenders: the classic SHO palette (that’s Sulfur-II, Hydrogen-alpha, and Oxygen-III) and the dynamic narrowband combination technique that many people use from this website.
Now, you might be wondering, “Which one’s better?” Honestly, I don’t think there’s a definitive answer. I find myself using both pretty equally in my own work. My process often involves trying out both methods to see which one really brings out the best in a particular image. It’s a bit like having two different paintbrushes for the same canvas – each can create a unique effect, and sometimes one just feels right for the subject.
Getting Technical: What Are These Methods?
Let’s break down what each method actually does.
The SHO Palette
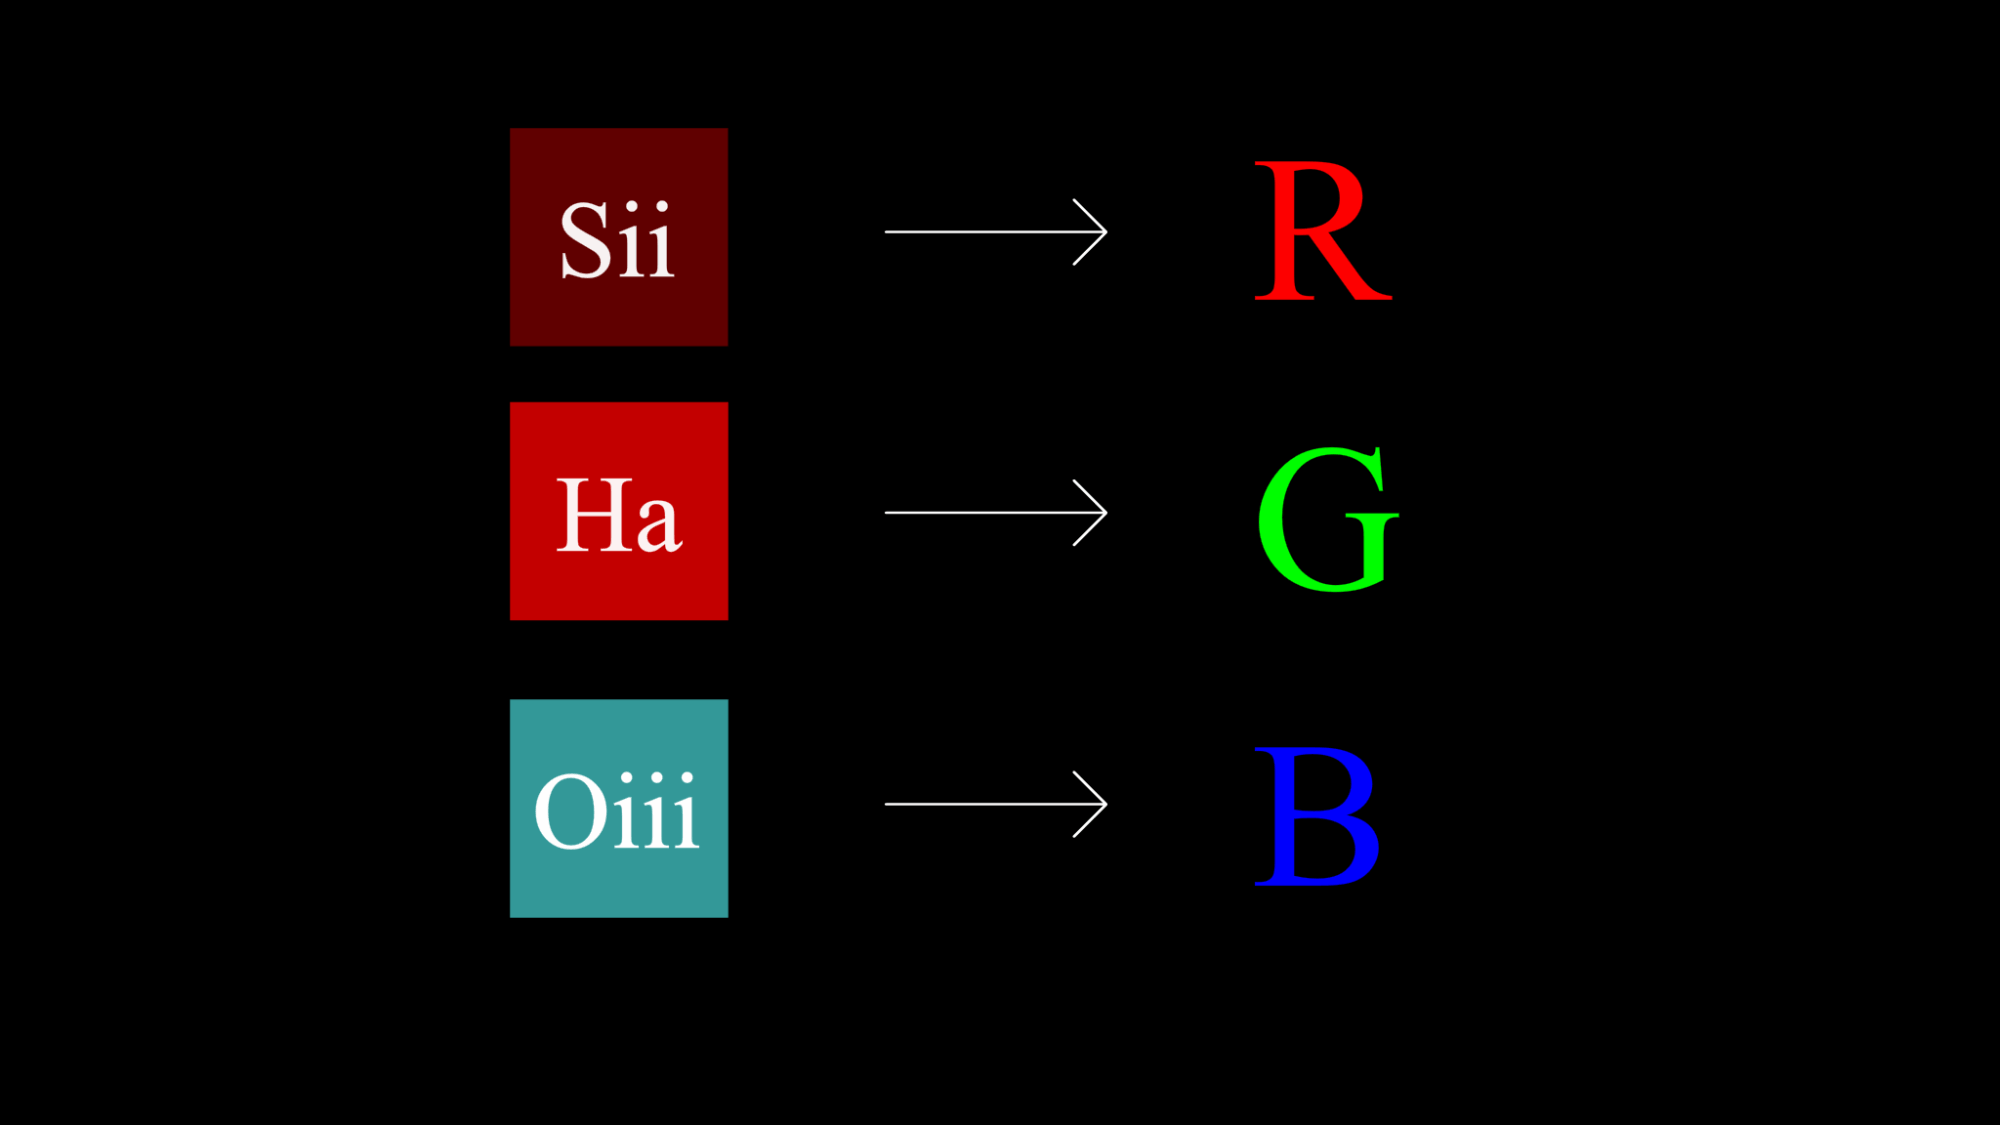
The SHO palette is pretty straightforward: I assign my Sulfur-II data to the red channel, my Hydrogen-alpha data to the green channel, and my Oxygen-III data to the blue channel. It’s a tried-and-true mapping that often produces those beautiful, iconic “Hubble palette” colors.
Dynamic Narrowband Combinations
The dynamic narrowband combination, on the other hand, is a bit more involved. It uses a specific, more complex pixelmath formula. What I really like about this method is how it dynamically combines the narrowband signals. It looks at the strength of each signal in every master channel and adjusts the combination accordingly, which can lead to some really interesting and unique color results.

Putting Them to the Test: The Christmas Tree Cluster
To really show you the difference, I recently worked on images of the Christmas Tree Cluster. My master files were already stretched, so I was ready to jump straight into the color mapping.
My Approach with SHO
When I apply the SHO palette, the first thing I notice is how green the image usually becomes. This is totally normal because Hydrogen-alpha is such a strong signal, and I’ve mapped it directly to the green channel. To tackle this, I use a fantastic modified SCNR formula by James Lamb. It’s brilliant because it removes that overwhelming green without stripping away too much of the valuable signal.

Sometimes, after dealing with the green, I’ll see some magenta artifacts pop up. My trick for this is to invert the image (which turns the magenta to green), apply that modified SCNR again, and then invert it back. It sounds a bit like a dance, but it really cleans up those stubborn color casts.

My Approach with Dynamic Narrowband Combinations
Switching over to the dynamic narrowband method, I simply apply the specific pixel math formula. It’s fascinating to watch how the software then calculates how much of each master file (SII, Ha, OIII) contributes to the red, green, and blue channels. The immediate result is usually quite different from the SHO output, often with a distinct color balance.

The Finishing Touches: Adding Luminance and Final Adjustments

No matter which color combination I go with, I almost always add my Hydrogen-alpha data as a luminance layer. This is a game-changer for bringing out those fine details and boosting the overall signal in the image. It really helps make the nebulosity pop
After that, it’s all about the final tweaks – adjusting contrast and saturation to my liking. This is where I really get to make the image sing and refine the look.
My Verdict on the Christmas Tree Cluster
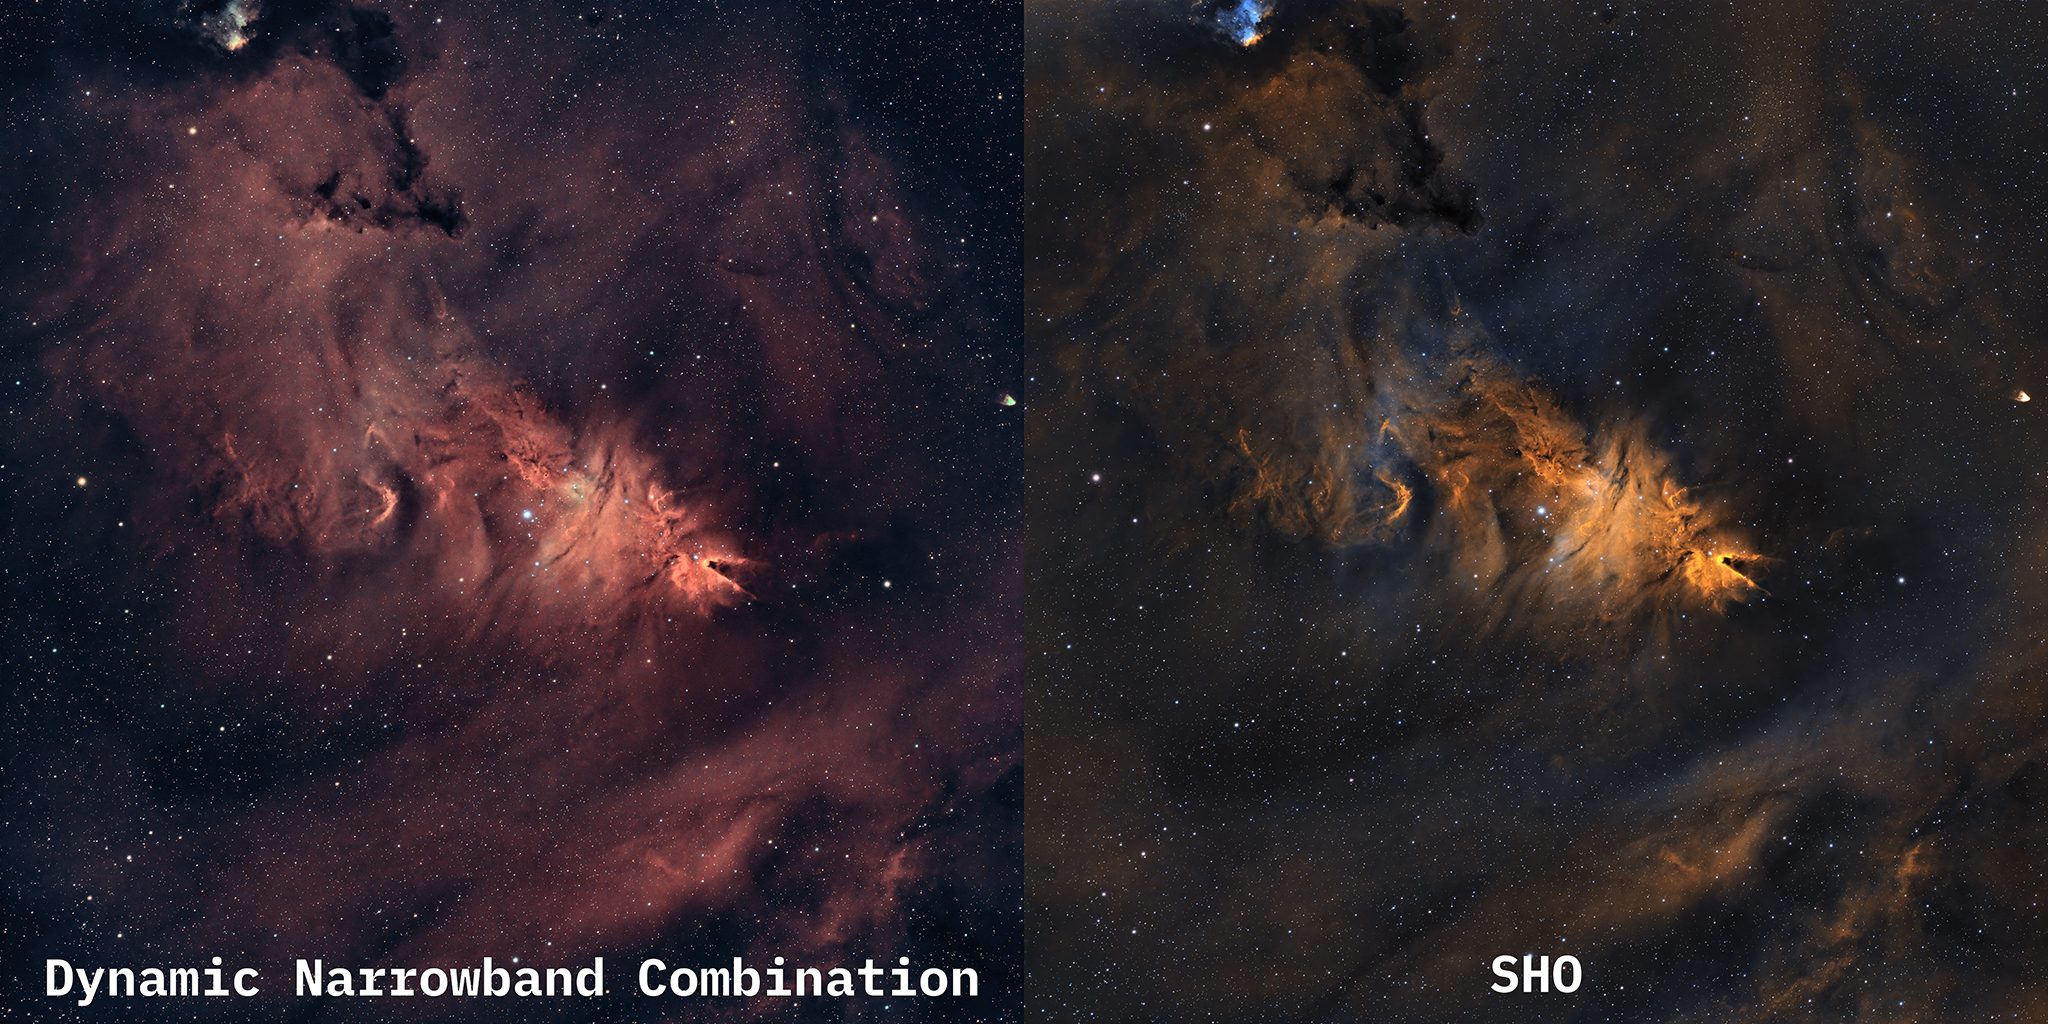
After processing the Christmas Tree Cluster with both techniques, the differences were quite striking. For this particular target, I actually found myself preferring the SHO method. The OIII signal in the Christmas Tree Cluster came through much more prominently and beautifully with SHO, giving it a look I was really happy with. But again, that’s just my preference for this specific image. For another nebula, the dynamic narrowband might be the clear winner, as it was with my recent processing of the Seagull Nebula.

Video
If you prefer watching this come to life in real time, see my video below, in which I walk through both processes.


