
I’ve had a short, yet long history with the Hercules Cluster. It started in 2022 when I got my first telescope, a Redcat 51 and decided I was going to capture this amazing wonder. To my surprise, this amazing wonder turned out to be the size of a small fly in the middle of my picture with hardly any detail. That’s because I was using a 250mm telescope with an APS-C mirrorless camera. At the time, I was surprised it was so small, but as I grew into this hobby, I understood why. I then went on to shoot it in 2023, 2024, and now in 2025.
I’m going to document from newest to oldest my images over the years of this amazing globular cluster. I’ll also share the equipment I used, how much integration time was involved, and processing steps.
I’ll even add to this post as I will likely take it each year. First, let’s start with some facts about The Great Hercules Cluster.
5 Surprising Facts About the Great Hercules Globular Cluster
- The Great Hercules Cluster, also known as M13, is one of the brightest globular clusters visible from Earth, making it a popular target for amateur astronomers.
- This cluster contains over 100,000 stars, many of which are older than our Sun, providing valuable insights into the formation of stars and galaxies.
- The Great Hercules Cluster is located approximately 25,000 light-years away from Earth in the constellation Hercules, and it spans about 145 light-years in diameter.
- M13 is not just a single cluster but a collection of stars that are gravitationally bound together, showcasing the dynamic nature of star clusters.
- The cluster is home to several variable stars and has been studied extensively, revealing information about stellar evolution and cluster dynamics.
My Astrophotography Obsession with The Great Hercules Cluster
Every year, between June and July, I make it a point to capture the Great Hercules Cluster, also known as M13 or Messier 13. This time of year is particularly special for astrophotographers because the northern hemisphere night sky is dominated by globular clusters, and without a doubt, M13 is the king of all globular star clusters.
Located in the constellation of Hercules, the Hercules globular cluster is one of the brightest and most spectacular deep-sky objects. It was cataloged by Charles Messier and is easily visible to the naked eye under optimal conditions. During a moonless night, its apparent magnitude of 5.8 makes it a must-see target for anyone interested in astronomy.
As you capture the Hercules cluster, take note of the nearby galaxy NGC 6207, which is often seen edge-on. This distant galaxy is about 30 million light-years away, providing a stunning backdrop to the bright stars of M13.
Astrophotography of the great globular cluster in Hercules also offers a chance to explore the beauty of star colors and the intricate details of this magnificent star cluster.
The Great Hercules Globular Cluster Through The Years
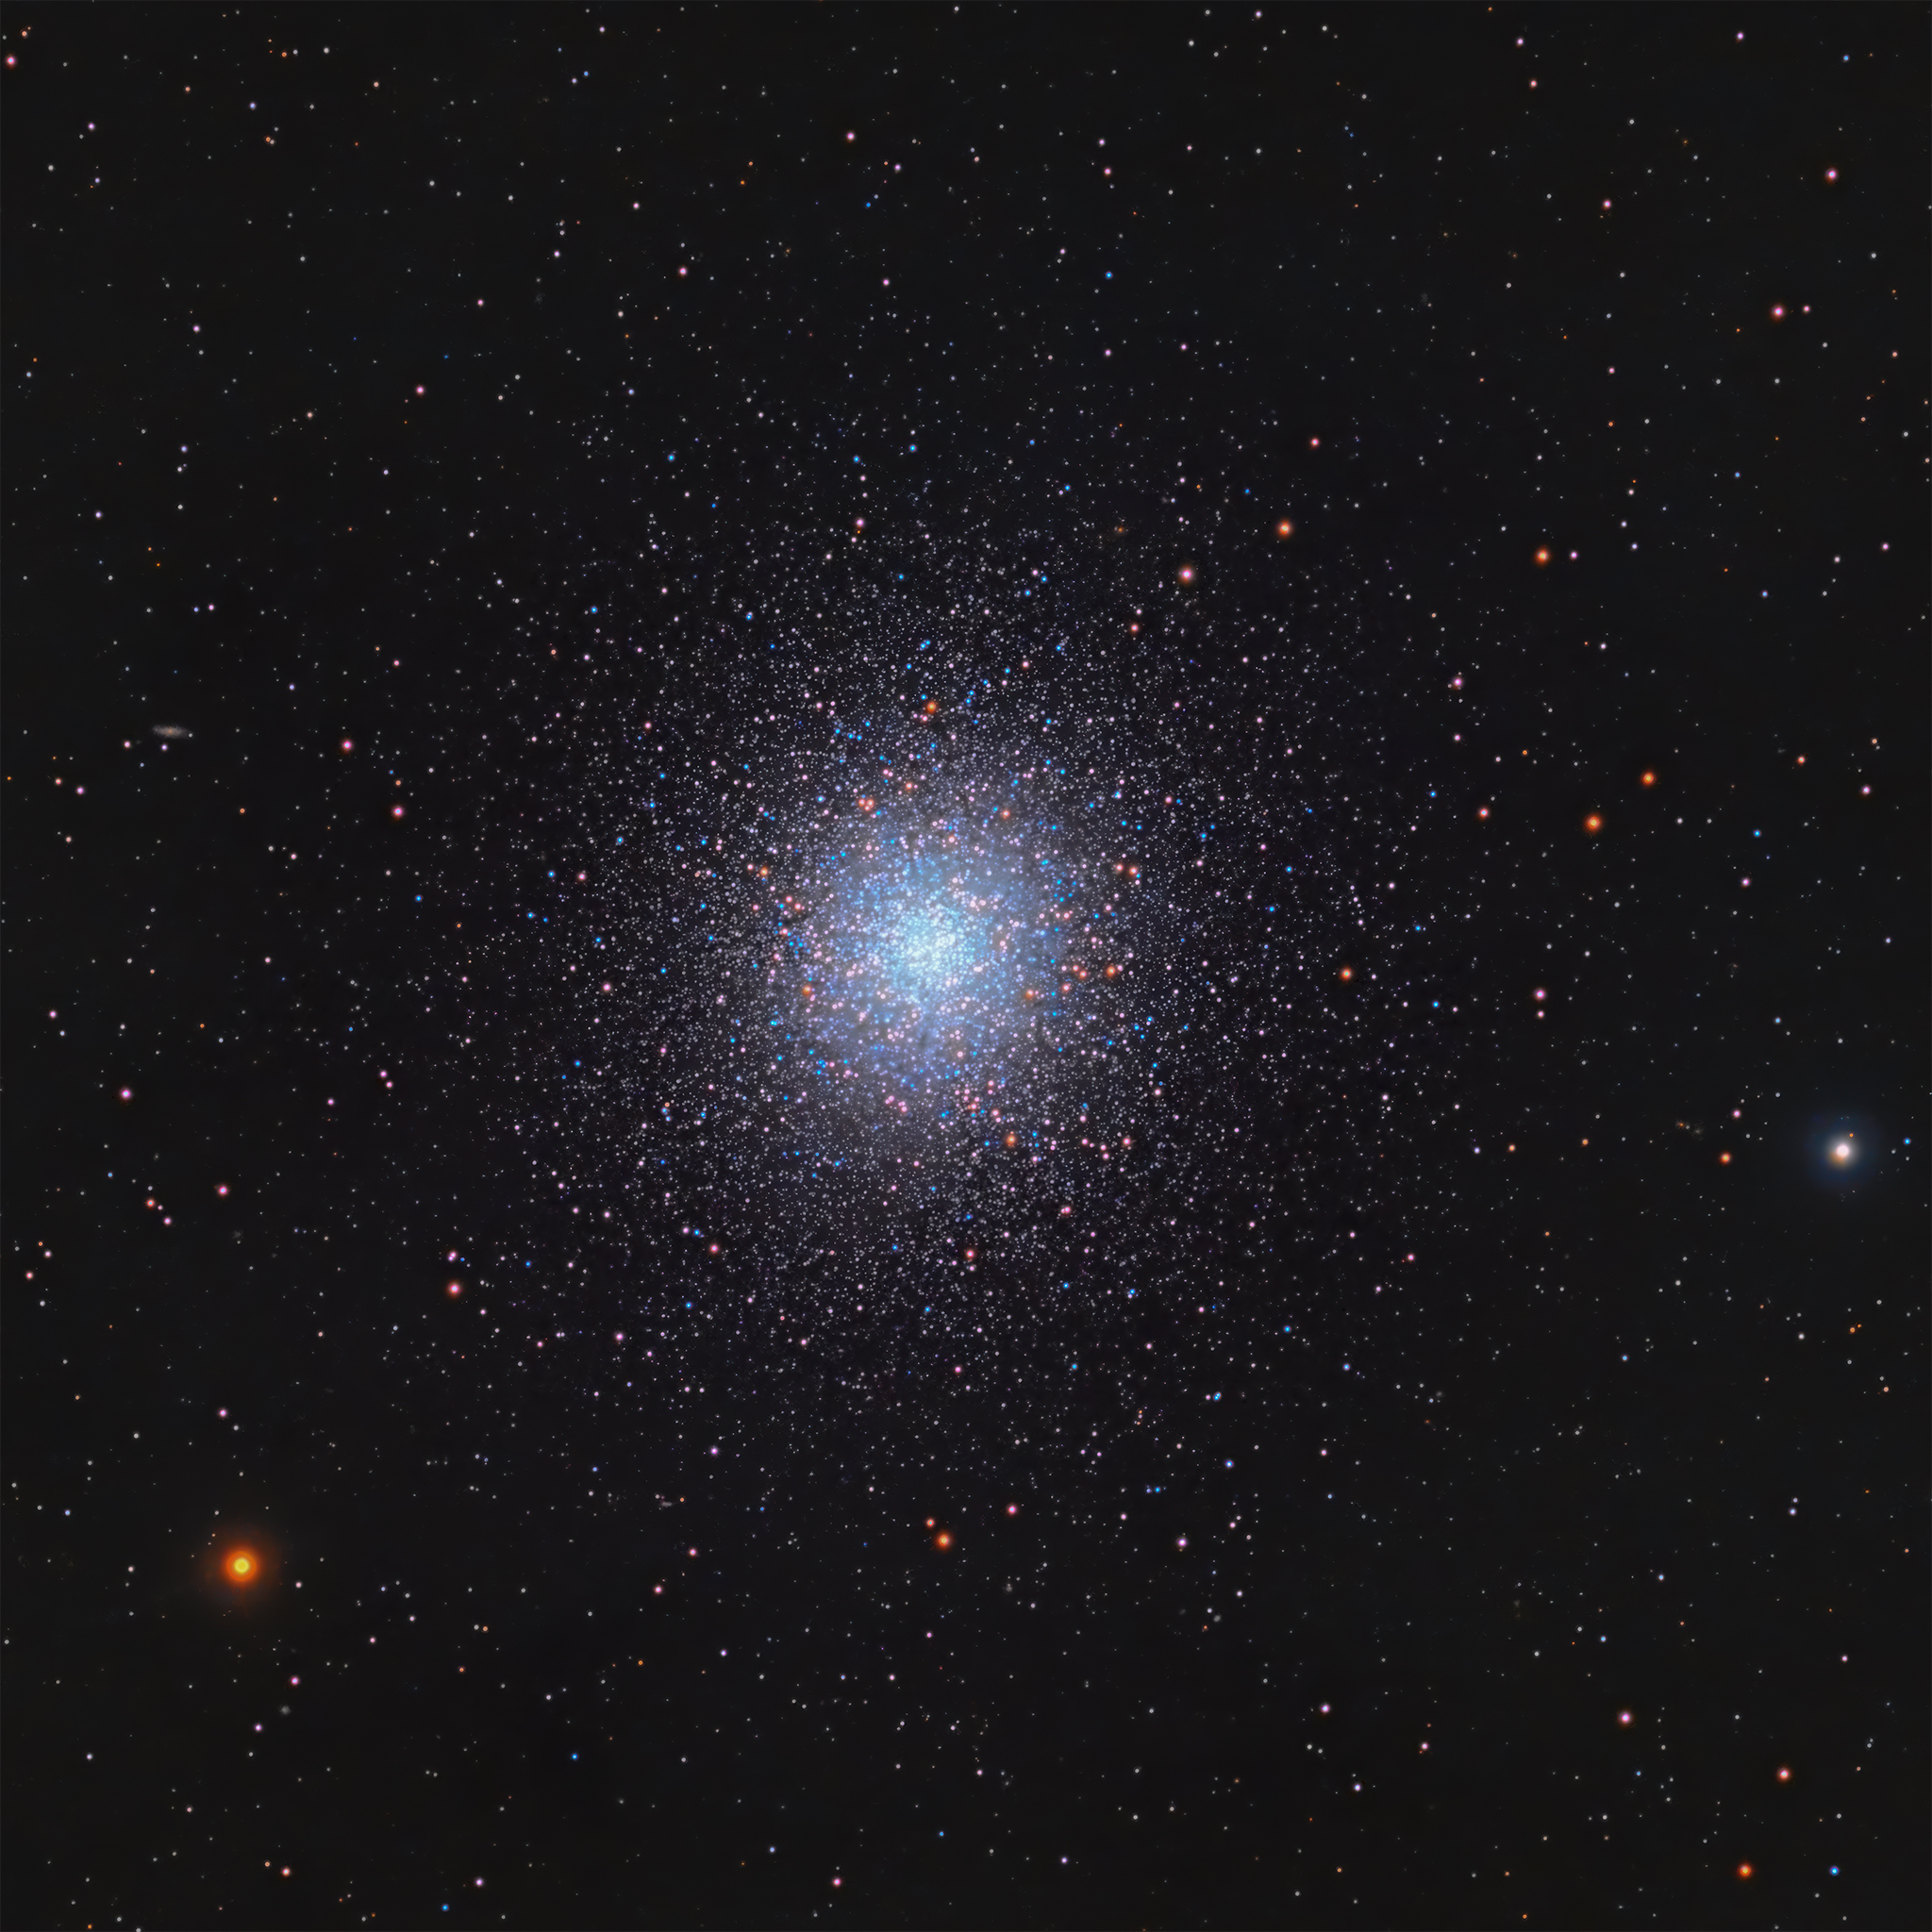
2025: Messier 13 on a Celestron Edge HD 8″ Telescope at 1499mm
I took this this year’s M13 project with a Celestron Edge HD 8″ which gave me 1499mm of reach. This is the longest I’ve ever taken the Great Hercules Cluster at and I think it came out amazing. Using my ZWO ASI533MM Astro Camera, I get a field of view of about 43°. This image had 5.5 hours of data including 79 minutes of red, 57 minutes of green, 58 minutes of blue, and 136 minutes of Luminance.

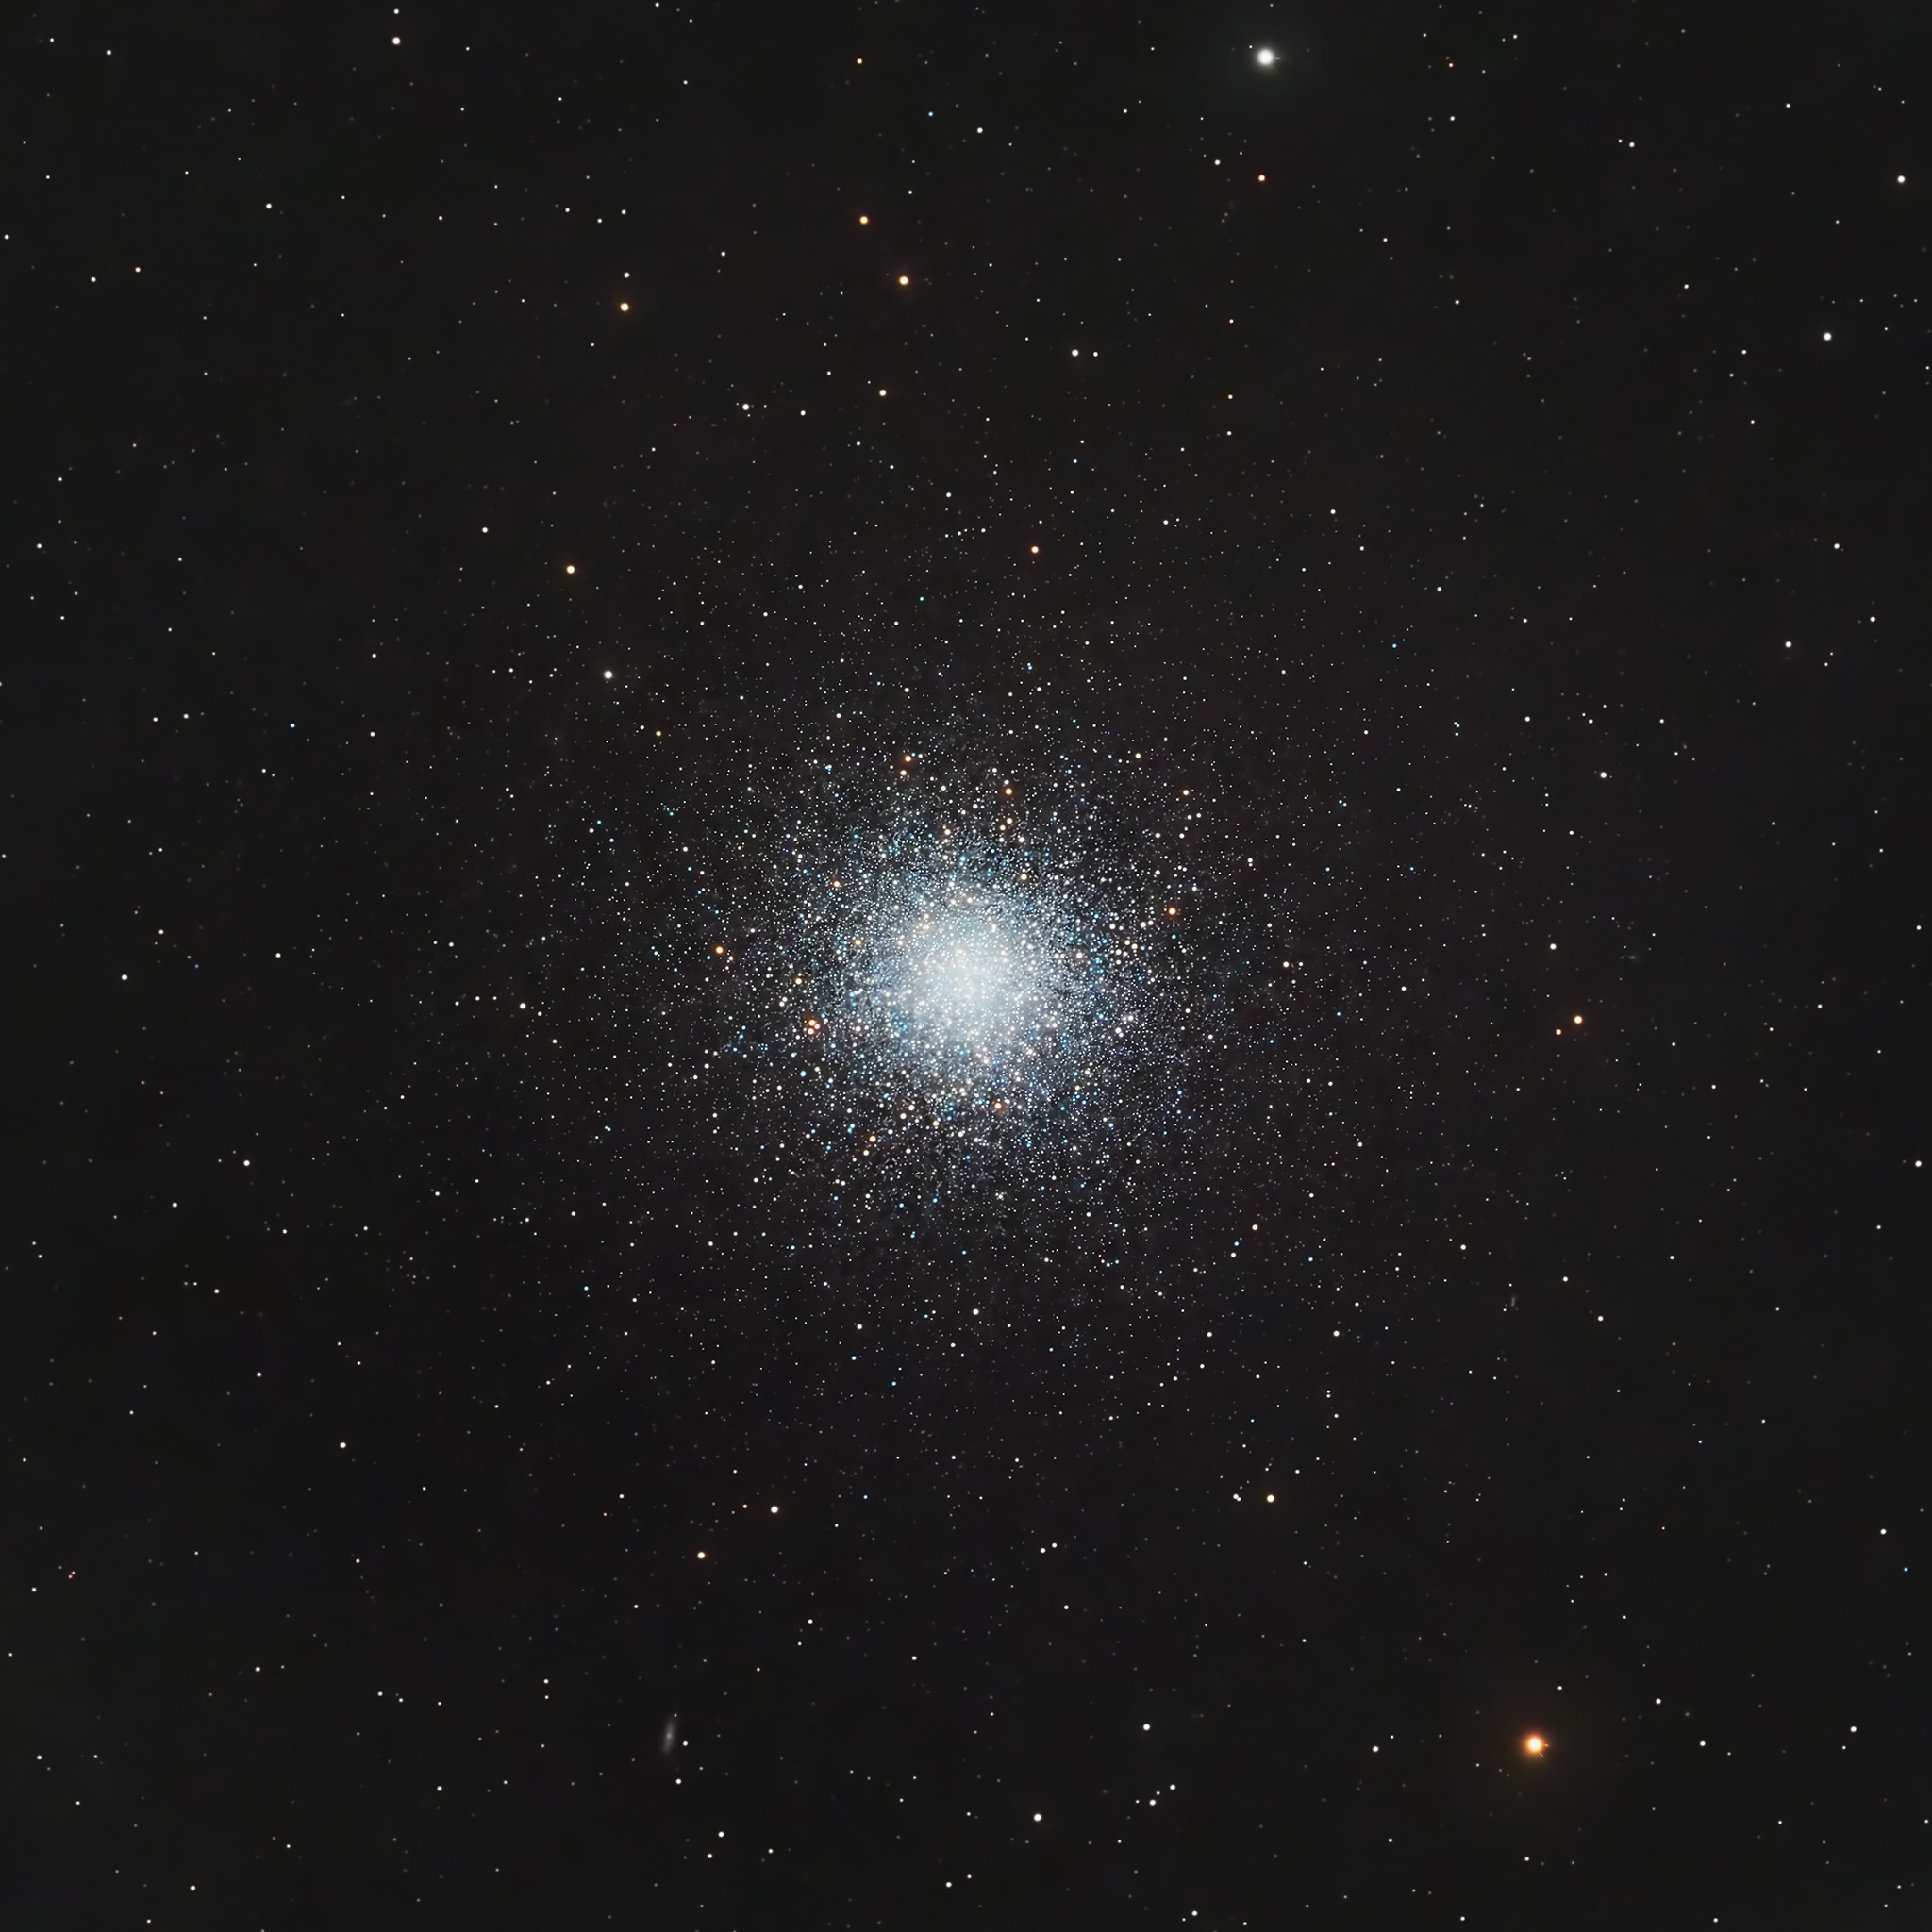
2024: The Great Globular Cluster in Hercules with an Astro-Tech AT115EDT Telescope at 805mm
In 2024, I took this with my trusty Astro-Tech AT115EDT. This had a total of 10h 36m of integration time. Compared to what I did in 2023, it was definitely more colorful and detailed. For more details, see this image on Astrobin or read my post about processing this in Pixinsight
2023: First Image of M13 with the Astro-Tech AT115EDT
This was my first “real” image of The Great Hercules Cluster because I actually had integration time. This had a total of 3h 37m integration time. To learn more about how I took this image, please read my detailed post.
2022: The Great Hercules Cluster on a Redcat 51 Telescope with a Fujifilm XS-10 APS-C DSLR camera.
I’m not sure if this one counts as an attempt, but I’m counting it as one. It’s actually just 1 sub, but it was the first image or sub I ever took and it’s sad looking. It may have simply been a 30 second exposure.

Shooting M13 – The Great Hercules Cluster
M13, also known as the Great Hercules Cluster or Messier 13, is a stunning globular cluster located in the constellation of Hercules. It is one of the best globular clusters visible in the northern hemisphere and is cataloged by Charles Messier. For astrophotographers aiming to capture this deep-sky object, there are several methods to consider using either a DSLR, mirrorless camera, or an astro camera like the ASI533MC color camera or ASI533MM mono camera.
Imaging Techniques
Using a DSLR or Mirrorless Camera
1. Setup: Attach your DSLR or mirrorless camera to a telescope using a T-ring and adapter.
2. Exposure Time: Start with a longer exposure time, around 30 seconds, to capture the light from the individual stars in M13.
3. ISO Settings: Set your ISO to a level that balances sensitivity and noise, typically between 800 and 1600.
4. Focus: Use a Bahtinov mask to achieve precise focus on bright stars like Vega or Arcturus.
5. Stacking Images: Take multiple images (10-20) and use stacking software to reduce noise and enhance detail in the final image.
Using an Astro Camera (i.e. ASI533MC or ASI533MM)
1. Setup: Connect your astro camera to the telescope and ensure it is properly calibrated.
2. Exposure Settings: Use shorter exposure times (15-30 seconds) and take many frames for better stacking results.
3. Cooling: Utilize the cooling feature in your astro camera to minimize thermal noise.
4. Software: Utilize dedicated astrophotography software to control the camera and capture images effectively. If you are using a ZWO astro camera like the ASI533 series, the ASIAir is a perfect companion.
Processing the Great Hercules Cluster Image in PixInsight
To process the Great Hercules Cluster (M13), follow these steps using PixInsight, a popular software for astrophotography. I have a video series on the steps I take in Pixinsight to process a nebula in mono. While these steps are also relevant for globular clusters, there are a few things that are different, particularly later in the process.
These steps assume you’ve already stacked your images using Pixinsight’s Weighted Batch Pre-Processing, DeepSkyStacker, or Astro Pixel Processor.
Lasly, I shoot in mono, but much of this can be applied to color images as well.
1. Dynamic Crop
Video here – crop your master images so they are all cropped in the same place. This is important if you have a mono workflow. It may not be as relevant if you use color and only have 1 image.
2. Dynamic Background Extraction
Video here – remove any nasty gradients created by light pollution so that your image has a flat dark background.
3. Deconvolution / Blur Xterminator
Video here – things ultimately happen when you shoot. Guiding goes off track, auto focus is not perfectly accurate resulting in larger or blurry stars. Deconvolution helps fix these issues. I use Blur Xterminator, a paid plugin for Pixinsight which makes this complex process easy peasy.
4. Noise Reduction
Video here – I used Multiscale Linear Transform for noise reduction in this video prior to stretching the image. Multiscale Linear Transform can only be used while the image is still linear (pre-stretch). You can also use the paid plugin, Noise Xterminator which I’m using more and more now.
5. Channel Combination
If you shoot color, you can skip this step.
Video here – Once you’ve applied noise reduction to all your master files, you can combine your R, G, and B master files using channel combination to produce a color image. I also have a simple method for color calibration in the video, but I recommend you skip that and do Spectrophotometric Color Calibration instead in the next step.
6. Spectrophotometric Color Calibration
There are a number of ways to color calibrate in Pixinsight. I use Spectrophotometric Color Calibration which is the most effective way. This is a step not included in my video tutorial as it’s unique to LRGB broadband shooting. However, I do have a separate step-by-step post as well as video tutorial on how to do this.
7. Histogram Transformation
Video here – Once the image is color calibrated, you can start stretching it bringing it into a non-linear state. I used Histogram Transformation in the video tutorial, but I’ve been using Generalized Hyperbolic Stretch (GHS) more and more.
8. Modified SCNR
I like to remove green and purple casts that unfortunately, happen on all images. For this, I use a PixelMath script developed by James Lamb that is similar to the built in Pixinsight process SCNR, but, it’s not as harsh. James Lamb’s full video tutorial is here.
9. Star Xterminator
My technique with globular clusters is a bit different with this though. Here it is:
- Use Star Xterminator to remove the stars, make sure unscreen stars is checked.
- Once you split the image into 2 – just the background and core glow AND the stars image:
- Darken the background, but mask the core using the GAME script so the core stays bright.
- On the stars image, use curves transformation to brighten the stars and add saturation to them.
- You may also want to sharpen them using Local Histogram Transformation.
- Combine the 2 images together again using Pixelmath and using the below formula to combine them. RGB should be your background and RGB_stars should be the name of your star image.
combine(RGB, RGB_stars, op_screen())
10. Save
- Once satisfied with the final image, save the project in Pixinsight.
- Save the image as a 16-bit TIFF
- Bring the TIFF into Photoshop or Affinity Photo, crop it (if needed) and export it as a JPEG.
Conclusion
That’s it! That’s how I made my 2025 image of the Great Hercules Cluster. Of course, you need the right equipment to shoot this, but shooting is only half the battle. Pixinsight processing is the other half.
Clear skies!


